文章目录[x]
- 0.1:主要功能特点
- 0.2:下载
- 0.3:安装部署
- 0.4:配置文件
- 0.5:管理端页面
- 0.6:FFmpeg推流
之前做项目的时候使用的是nginx-rtmp-module实现推流服务的,最近发现EasyDarwin更好用。https://github.com/arut/nginx-rtmp-module
主要功能特点
- 基于Golang开发维护;
- 支持Windows、Linux、macOS平台;
- 支持RTSP推流分发(推模式转发);
- 支持RTSP拉流分发(拉模式转发);
- 服务端录像 参考:https://blog.csdn.net/jyt0551/article/details/84189498
- 服务端录像检索与回放 参考:https://blog.csdn.net/jyt0551/article/details/84189498
- 关键帧缓存;
- 秒开画面;
- Web后台管理;
- 分布式负载均衡;
下载
https://github.com/EasyDarwin/EasyDarwin
安装部署
- -下载解压 release 包
- - (Windows exe模式) 直接运行asyDarwin.exe,以 Ctrl + C 停止服务。
- - (Windows 服务模式) 以服务启动 ServiceInstall-EasyDarwin.exe,以 ServiceUninstall-EasyDarwin.exe 卸载 EasyDarwin 服务。
- - (Linux/macOS)直接运行
cd EasyDarwin
  ./easydarwin
  # Ctrl + C
- - (Linux/macOS)以服务启动
cd EasyDarwin
  ./start.sh
  # ./stop.sh
- - 查看界面
打开浏览器输入 http://localhost:10008, 进入控制页面,默认用户名密码是admin/admin
- - 测试推流
ffmpeg -re -i C:\Users\Administrator\Videos\test.mkv -rtsp_transport tcp -vcodec h264 -f rtsp rtsp://localhost/test
ffmpeg -re -i C:\Users\Administrator\Videos\test.mkv -rtsp_transport udp -vcodec h264 -f rtsp rtsp://localhost/test
---
//推流摄像头
//输出DirectShow支持的设备列表
ffmpeg -list_devices true -f dshow -i dummy
ffmpeg -f dshow -i video="你的设备名称" -vcodec libx264 -preset:v ultrafast -tune:v zerolatency -rtsp_transport tcp -f rtsp rtsp://192.168.2.44:554/stream
- - 测试播放
ffplay -rtsp_transport tcp rtsp://localhost/test
ffplay rtsp://localhost/test
配置文件
下载好的文件包括了easydarwin.ini,这个文件配置了常用设置。
http的端口号默认为 10008
默认的用户名、密码 均为 admin
rtsp的端口号默认为 554
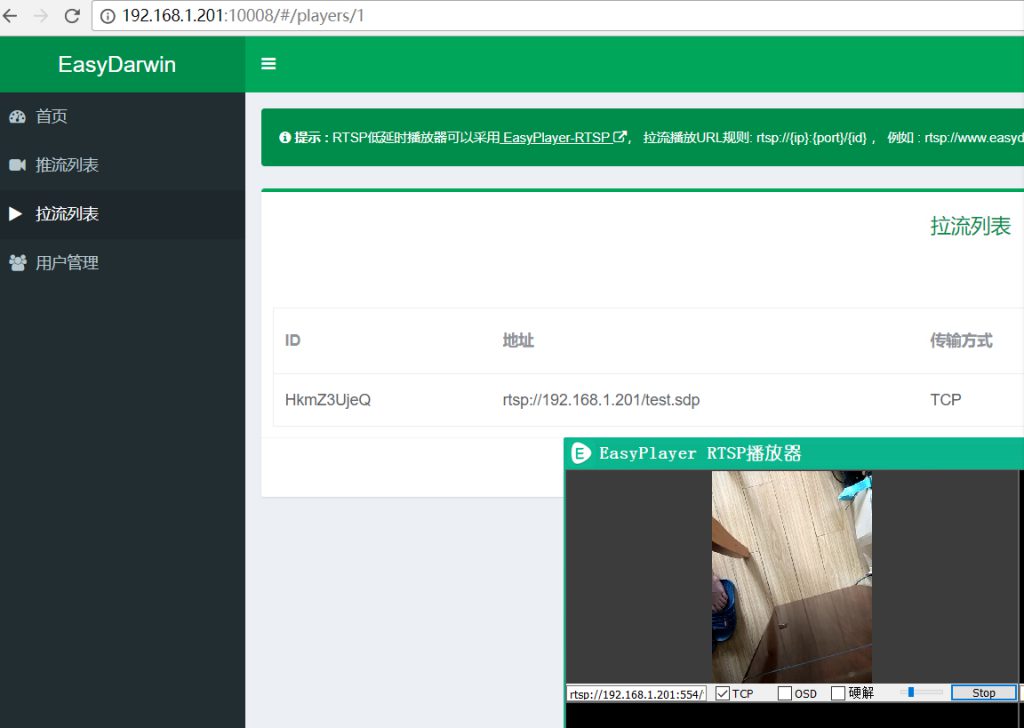
管理端页面

FFmpeg推流
ffmpeg推流命令
ffmpeg -re -i <视频地址> -rtsp_transport <传输方式 tcp/udp> -vcodec h264 -f rtsp rtsp://<服务器IP>/<子路径>

-re 表示按照帧率发送,否则ffmpeg会按照最高速率向流媒体服务器发送数据
-i filename 指定输入文件名
-vcodec codec 强制使用codec编解码('copy’代表不进行重新编码)
-f fmt 指定视频或音频的格式
例如: ffmpeg -re -i D:\电影.mp4 -rtsp_transport tcp -vcodec h264 -f rtsp rtsp://localhost/test
这里的播放地址,就是之前设置的 rtsp://localhost/test
