一、功能描述
1、基于路线,每条路线定时生成车辆,车辆沿着路线预设好的点移动。
2、轻量级,没有使用物理系统,车辆的运动使用的API是transform.Translate()。
3、可以实现曲线路线(为了真实需要设置更多的点位)。
4、在路口可以设置通行规则,目前只实现了十字路口。
5、随机车辆类型、随机生成车辆间隔、随机初始车速。
6、没有实现上下坡,只能在同一水平面。
二、初始化场景

1、搭建场景。
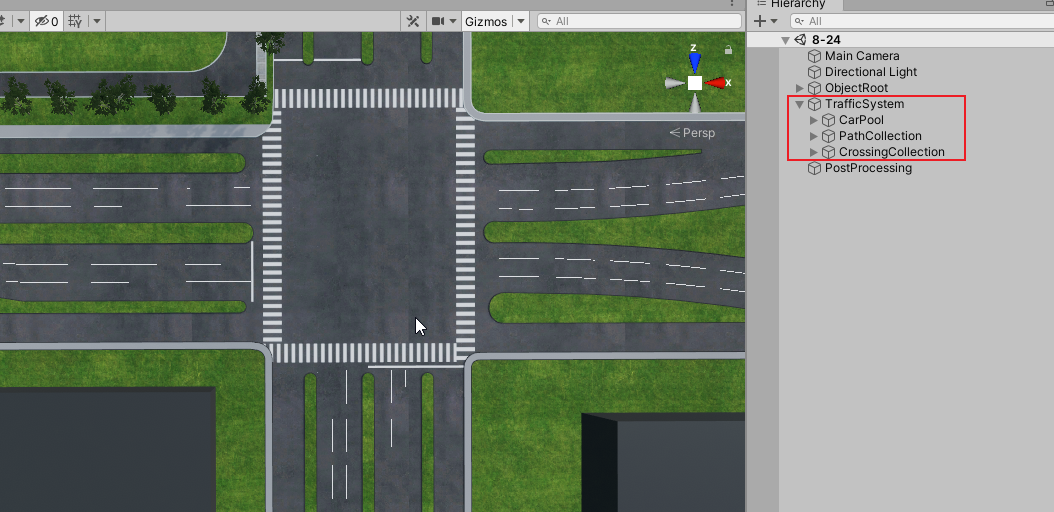
2、在Hierarchy窗口创建一个空物体命名为“TrafficSystem”,在下面再创建三个空物体分布命名为CarPool、PathCollection、CrossingCollection,用来归类存放车辆预制体、行驶路线和路口。
三、行驶路线

1、新建脚本CarPathPair
using System.Collections;
using System.Collections.Generic;
using UnityEngine;

public class CarPathPair : MonoBehaviour
{
    public float Duration;//生成车辆的间隔
    private GameObject[] CarPrefabs;//汽车预制体
    private Transform spawnPoint;//生成点
    private float timer;//计时器
    [SerializeField]
    private List<Vector3> wayPoints = new List<Vector3>();
    void Start()
    {
        Init();
        SpawnCar();
    }
    void Update()
    {
        timer += Time.deltaTime;
        if(timer >= Duration)
        {
            timer = 0;
            SpawnCar();
        }
    }

    private void Init()
    {
        spawnPoint = transform.GetChild(0);
        CarPrefabs = CarPool.Instance.AllCars;
        for (int i=0;i<transform.childCount;i++)
        {
            wayPoints.Add(transform.GetChild(i).position);
        }
    }

    private void SpawnCar()
    {
        int carType = Random.Range(0, CarPrefabs.Length);
        GameObject tempCar = Instantiate(CarPrefabs[carType],spawnPoint.position,spawnPoint.rotation,transform);
        tempCar.SetActive(true);
        CarMovement carMove = tempCar.AddComponent<CarMovement>();
        carMove.WayPoints = wayPoints;
    }

#if UNITY_EDITOR
    private void OnDrawGizmosSelected()
    {
        Gizmos.color = Color.yellow;
        for(int i=0;i<transform.childCount-1;i++)
        {
            Gizmos.DrawLine(transform.GetChild(i).position, transform.GetChild(i+1).position);
        }
    }
#endif
}
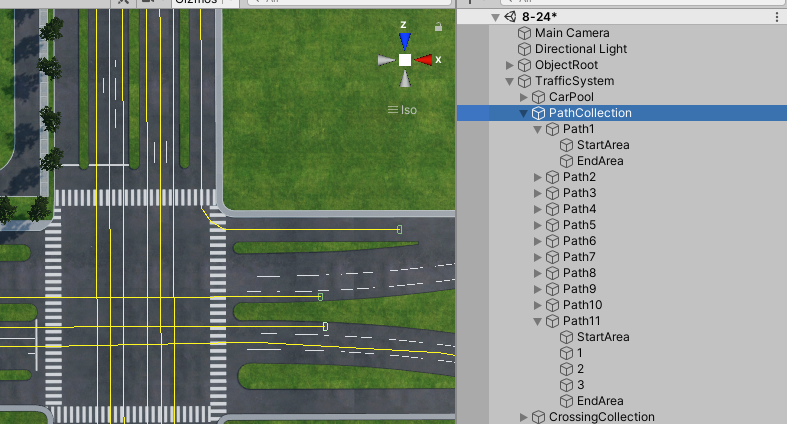
2、在PathCollection下面新建空物体挂载‘CarPathPair.cs’,重命名该物体为Path1(或者其他可以区分不同路线的名字)。
3、在Path1下面相继创建空物体作为这条路线的路径点,在拐角处多放置一些可以让车辆运动平滑一些。
4、在最后一个点上添加BoxCollider,车辆再达到终点时候会自动销毁,如果不添加则会一直沿着最后的方向移动,90秒后再销毁。
四、车辆预制体

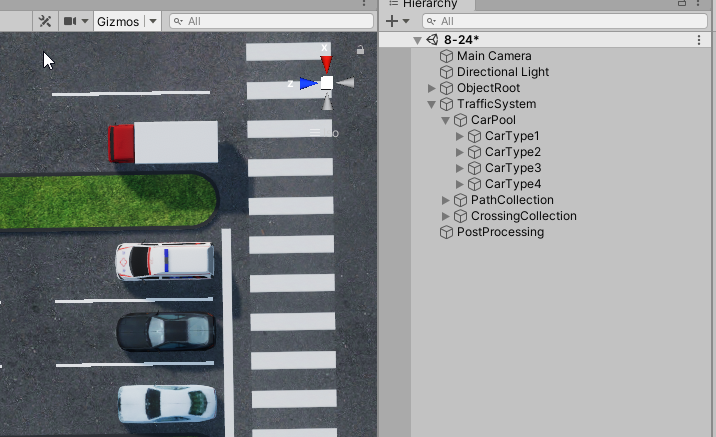
1、在CarPool下面添加自己的车辆模型,把车头方向调整为z轴方向。
2、在Project窗口中添加CarMovement脚本,脚本不需要挂载到车辆上,它在实例化车辆的时候自动添加上去。
using System.Collections;
using System.Collections.Generic;
using UnityEngine;

public class CarMovement : MonoBehaviour
{
    private float carSpeed = 10f;//车速
    private float initSpeed;//初始车速
    private bool isWaitTraffic = false;//是否在路口等待
    private float detectDis = 5.5f;//向前检测距离

    public List<Vector3> WayPoints { get; set; }
    private int pointIndex = 1;
    private void Start()
    {
        initSpeed = Random.Range(15f, 20f);
        carSpeed = initSpeed;
        Destroy(gameObject, 90);
    }
    private void Update()
    {
        //SimpleMovement();
        Movement();
        DetectForward();
    }

    private void ResetCarSpeed()
    {
        if(!isWaitTraffic)
            carSpeed += 2.5f;
    }

    //simple move 走直线
    private void SimpleMovement()
    {
        transform.Translate(Vector3.forward * Time.deltaTime * carSpeed);
    }

    private void Movement()
    {
        Vector3 dir = WayPoints[pointIndex] - WayPoints[pointIndex - 1];
        transform.Translate(dir.normalized * Time.deltaTime * carSpeed,Space.World);
        transform.rotation = Quaternion.Lerp(transform.rotation, Quaternion.LookRotation(dir,Vector3.up), Time.deltaTime*10);
        if(Vector3.SqrMagnitude(WayPoints[pointIndex]-transform.position) < 0.2f)//根据速度设置检测距离 过小会检测已经到了点位导致车辆不再转向
        {
            pointIndex++;
            if(pointIndex>=WayPoints.Count)
            {
                Destroy(gameObject);
            }
        }
    }

    //向前探测
    private void DetectForward()
    {
        Ray ray = new Ray(transform.position, transform.forward);
        RaycastHit hitInfo;
        if (Physics.Raycast(ray, out hitInfo, detectDis))
        {
            switch (hitInfo.transform.tag)
            {
                case "Car":
                    CarMovement preCar = hitInfo.transform.GetComponent<CarMovement>();
                    if(preCar.isWaitTraffic)
                    {
                        carSpeed = 0;
                        this.isWaitTraffic = true;
                    }
                    else
                    {
                        this.carSpeed = preCar.carSpeed;
                        preCar.ResetCarSpeed();
                    }
                    preCar.ResetCarSpeed();
                    break;
                case "Traffic":
                    isWaitTraffic = true;
                    carSpeed = 0;
                    break;
                default:
                    Destroy(gameObject);
                    break;
            }
        }
        else
        {
            isWaitTraffic = false;
            carSpeed = initSpeed;
        }
    }

#if UNITY_EDITOR
    private void OnDrawGizmos()
    {
        if (Application.isPlaying)
        {
            Gizmos.DrawRay(transform.position, transform.forward * detectDis);
        }
    }
#endif

}
3、在Project窗口添加CarPool脚本,负责添加各种车辆模型。。
using System.Collections;
using System.Collections.Generic;
using UnityEngine;
using DataPaddyBoot.Runtime.Singleton;

public class CarPool : MonoSingletonBase<CarPool>
{
    public GameObject[] AllCars;
}
4、把上面的脚本挂载到CarPool物体上,并为AllCars拖拽赋值。
五、设置路口

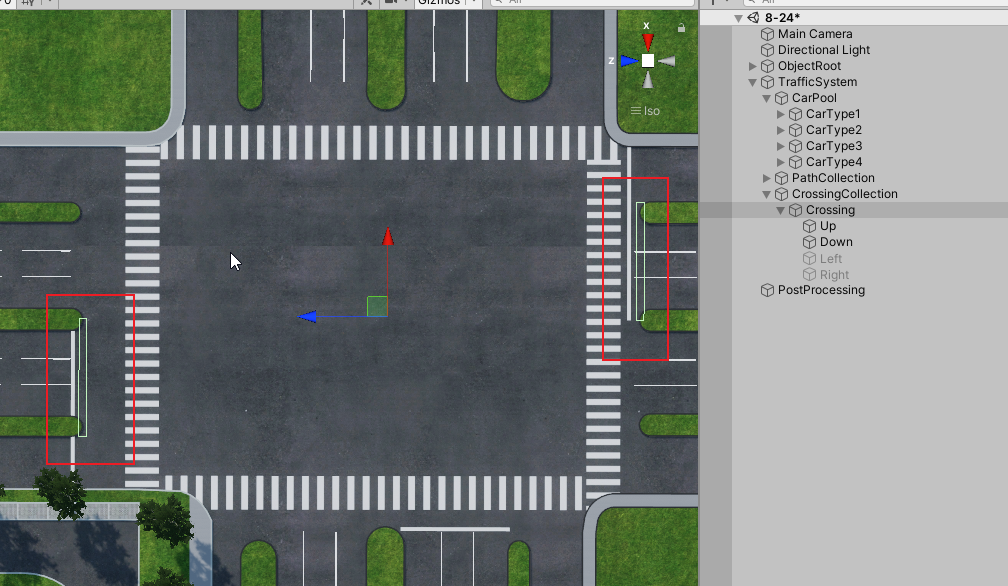
1、在CrossingCollection下面新建一个空物体名称为Crossing,再在下面创建四个碰撞体(分别命名为Up/Down/Left/Right),把它们分布放在停止线上。
2、添加脚本CrossingController,挂载到Crossing上。
using System.Collections;
using System.Collections.Generic;
using UnityEngine;

public class CrossingController : MonoBehaviour
{
    public float duration;//切换红绿灯间隔
    private float timer = 0;
    private bool vertical = true;

    private void Update()
    {
        timer += Time.deltaTime;
        if(timer>=duration)
        {
            timer = 0;
            vertical = !vertical;
            if(vertical)
            {
                StartCoroutine(ChangeVCrossing());
            }
            else
            {
                StartCoroutine(ChangeUCrossing());
            }
        }
    }

    private IEnumerator ChangeVCrossing()
    {
        transform.Find("Up").gameObject.SetActive(true);
        transform.Find("Down").gameObject.SetActive(true);
        yield return new WaitForSeconds(1.5f);
        transform.Find("Left").gameObject.SetActive(false);
        transform.Find("Right").gameObject.SetActive(false);
    }

    private IEnumerator ChangeUCrossing()
    {
        transform.Find("Left").gameObject.SetActive(true);
        transform.Find("Right").gameObject.SetActive(true);
        yield return new WaitForSeconds(1.5f);
        transform.Find("Up").gameObject.SetActive(false);
        transform.Find("Down").gameObject.SetActive(false);
    }
}
3、为Crossing设置切换间隔。

大哥,能给下资源么,你的untiy城市这个
我这个是公司的项目,你可以在资源商店上找类似的场景。